Contents
- Index
Hints and Tips about Scanning
Scanning Overview
When scanning paper documents, GoldVisionPro™ can be used to as a one step link of the image files into GoldMine® system.
·
Any scanned image can be dragged from the desktop or a working folder to the GoldVisionPro™ V-QuickLink without file conversion using the normal method in the GoldVisionPro™ V-QuickLink.
·
Additionally, some scanning software, such as Scansoft's PaperPort, allow to setup a GoldVisionPro™ icon in the scanning program Window. PaperPort allows to configure the GoldVisionPro™ icon setup to first launch Adobe Acrobat to convert the image to a PDF file, and then automatically continue with the GoldVisionPro™ link process, all in one step.
·
Scansoft Paperport Setup
Adding the GoldVisionPro™ icon to the PaperPort Toolbar:
Step 1: Right-mouse-click on the Paperport Send To Bar on the bottom of the Paperport Desktop and select Add to Send To Bar.

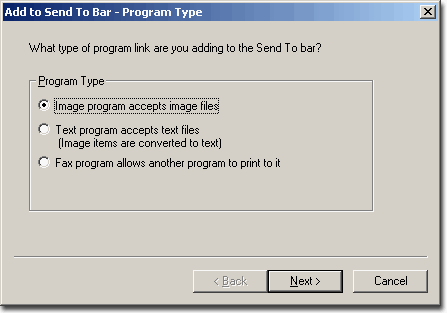
Step 2: Select Image Program Type and select Next.
Alternate Setup Note - When another file type if selected may require an adjustment in Step 4. Selecting Image type is recommended.
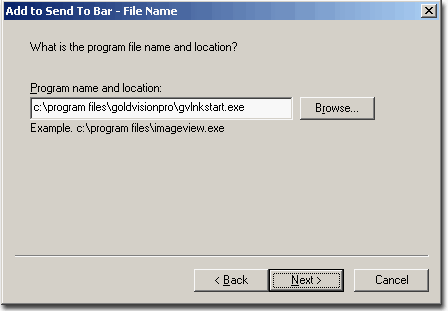
Step 3: Select the Program Name C:\Program Files\GoldVisionPro\V-QuickLink.exe either with the Browse button, or type in.
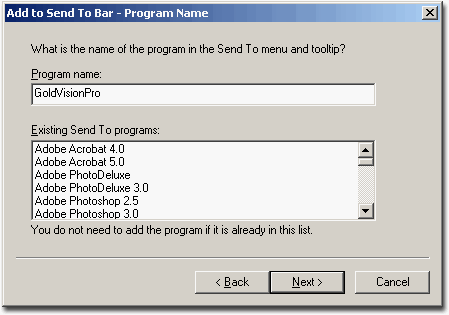
Step 4: Type in "GoldVisionPro" for the name to be associated with adding this icon.
Step 5: Select Adobe Portable Document (*.PDF)
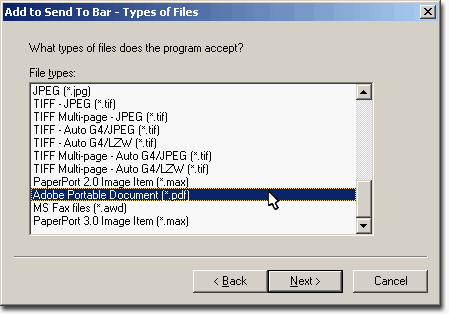
Alternate Setup Note - Any file type can be selected to convert to, such as .JPG, .GIF, .TIF or .BMP, however it is recommended to only choose one from this list.
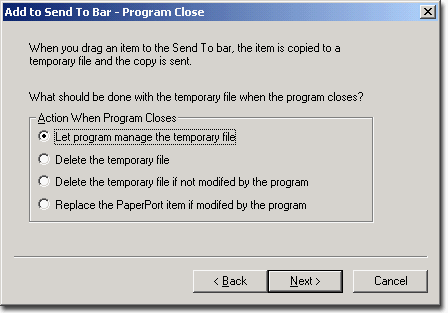
Step 6: Let the Program Manage the Temporary File
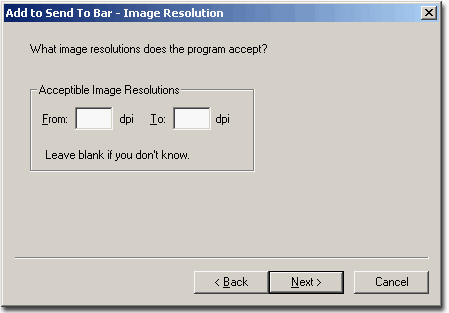
Step 7: Leave the DPI Settings as Default
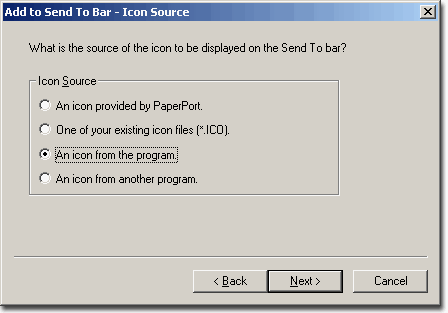
Step 8: Choose the ICON from the Program
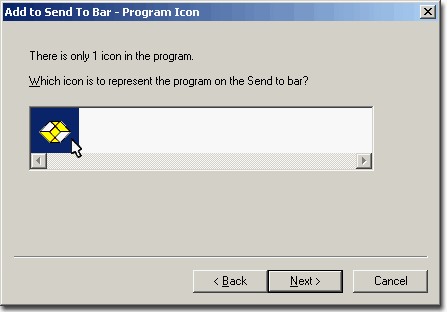
Step 9: Select the GoldVisionPro™ icon
Step 10: Press Finish
Step 11: Right-mouse-click on the GoldVisionPro™ icon on the Paperport Send To Bar, and Select Options.

Step 12: Uncheck the Reduce image to screen resolution (96 dpi) if it is checked. Checking this box will make the scans appear grainy after conversion.
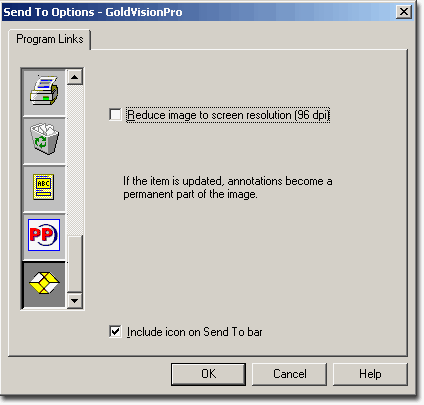
Note - The Send To Options screen can also be used to eliminate unwanted icons on the Send To Bar by unchecking Include Icon on Send To Bar.
Previous Step: Scanning and Faxing
Next Step: GoldVisionPro™ Link Center Overview
SEE ALSO
Integration with Other Software
© 1999-2003 GoldVisionPro™ - All Rights Reserved.

The GoldMine® Trademark is used by permission from FrontRange Solutions, Inc.


